

How To Fill An RV Water Tank
While touring with an RV offers luxuries that car camping or backpacking don’t, it also comes with unique needs such as how to transport water for drinking, cooking, and cleaning.
If you are staying in a campground with water hookups this is pretty simple but if you are boondocking in areas without utilities then you will need to bring all the water you need.
This means learning how to fill an RV water tank. While it is pretty straight forward it is important to follow some simple steps to maintain the safety of your drinking water and avoid costly repairs.
How much water do you need?
When you have headed away from civilization you will need roughly 2-4 gallons per person per day for drinking, showering, cooking, and cleaning.
Since water weighs almost 9 pounds per gallon you want to balance how much water you bring with how long you are going.
If possible fill your water tank just before you head off the grid as extended driving with that extra weight will negatively affect your gas mileage.
How long does the water stay safe to drink
The freshwater in your RV will be safe to drink for about two weeks.
After that time it can go stale and become unsafe to drink. Bacteria and mold can grow in the system so it is important to switch out the water regularly, properly winterize your system, and disinfect the water tank before use.
Signs your water has gone bad
- Odor or flavor – If your water smells musty or doesn’t taste fresh that is a good sign to flush the system and disinfect it.
- Color – If the water has changed color then it would be wise to avoid drinking. This may be from minerals but it is better to safe than sorry.
- Sickness – Nausea, stomach pain, or other gastrointestinal issues may be a sign that your water has gone off.
Disinfecting the system
You should disinfect your system at the beginning of each season and every 3-4 months of use. Additionally, if you find your water has gone bad then it is wise to give the system thorough disinfection.
- Completely drain the water tank and lines.
- Fill with fresh water
- Add a quarter cup of chlorine bleach per 15 gallons of water.
- Run the taps so the bleach-treated water is throughout the whole system.
- Let sit for 12 hours so the bleach has time to kill any pathogens.
- Drain the system and refill with fresh water.
- Run the taps until you don’t smell chlorine.
Setting up your water system to fill your freshwater tank
Some RVs have a separate hookup for hooking up a water line at a campground and one for filling the water tank. Others have a single hookup with a switch that allows you to switch between an external water supply and filling your freshwater tank.
If you have the latter make sure to switch to filling mode so the water will be directed into the tank. When using the water tank you will usually need to make sure you have turned the water pump on as it isn’t needed with the pressure from an external water supply.
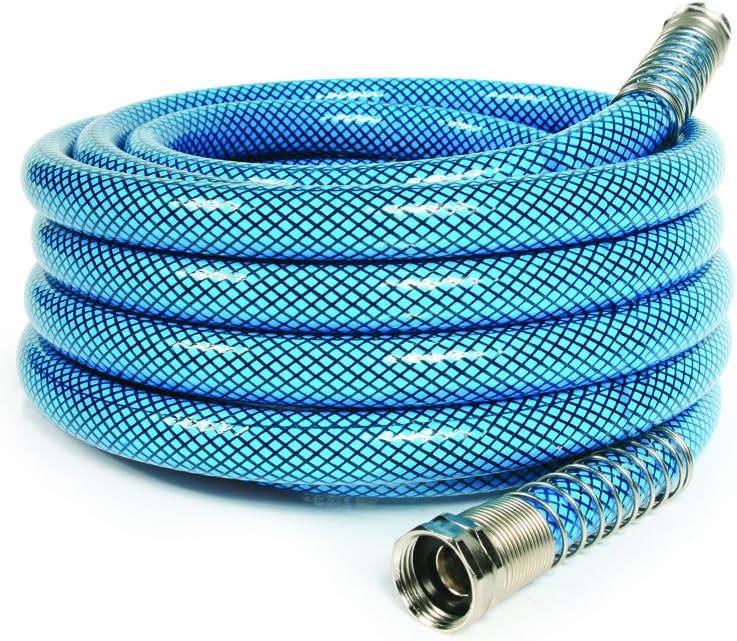
Choose the right hose
Don’t fill your RV water tank with a standard garden hose. They may have lead fittings and aren’t food-safe. Get a proper RV water hose from an RV center or online. They have a lining so no taste or chemicals leach from the hose. These hoses are usually either white or blue.
Only use this hose for filling your water tank to keep it from being contaminated. Don’t use it for draining your greywater or septic tank. After use drain the hose and let it dry so you don’t have bacteria or mold growth.
Add a filter
Unless you are confident in the safety of the water you are putting in the system it is smart to have a water filter on your hose to protect against waterborne pathogens such as bacteria and parasites.
Inline filters that attach to your hose have a lifespan of around 1 season of use. After you have used it make sure to drain the filter and let it dry so bacteria doesn’t grow inside it.
It is a good practice to flush it with chlorinated water every four weeks or when you put it away for the season. Mix a couple of caps of bleach with a half-gallon of water.
Pump that water through the filter and let it sit for 12 hours. Flush the filter with fresh water and let it dry thoroughly before you put it away.

From the tap
This is the simplest way to fill the tank. Just connect your drinking water-safe hose to your water intake on the RV and the other end to a tap. Turn the tap on and fill up the tank.
Depending on the flow rate of the tap and the size of your tank it can take up to 20 minutes to fill.
If you are using sources like public rest-stops and parks to fill up up your tank you may be faced with faucets that don’t have the proper threads.
In those cases, it is useful to have a Camco Water Bandit which will allow you to attach your hose to unthreaded faucets or ones with damaged threads.

With a pump
If you don’t have access to a faucet you can connect your hose to then you can fill your tank with external water jugs. This can be in the form of buckets, jugs, or water bladders designed to be safe for drinking water.
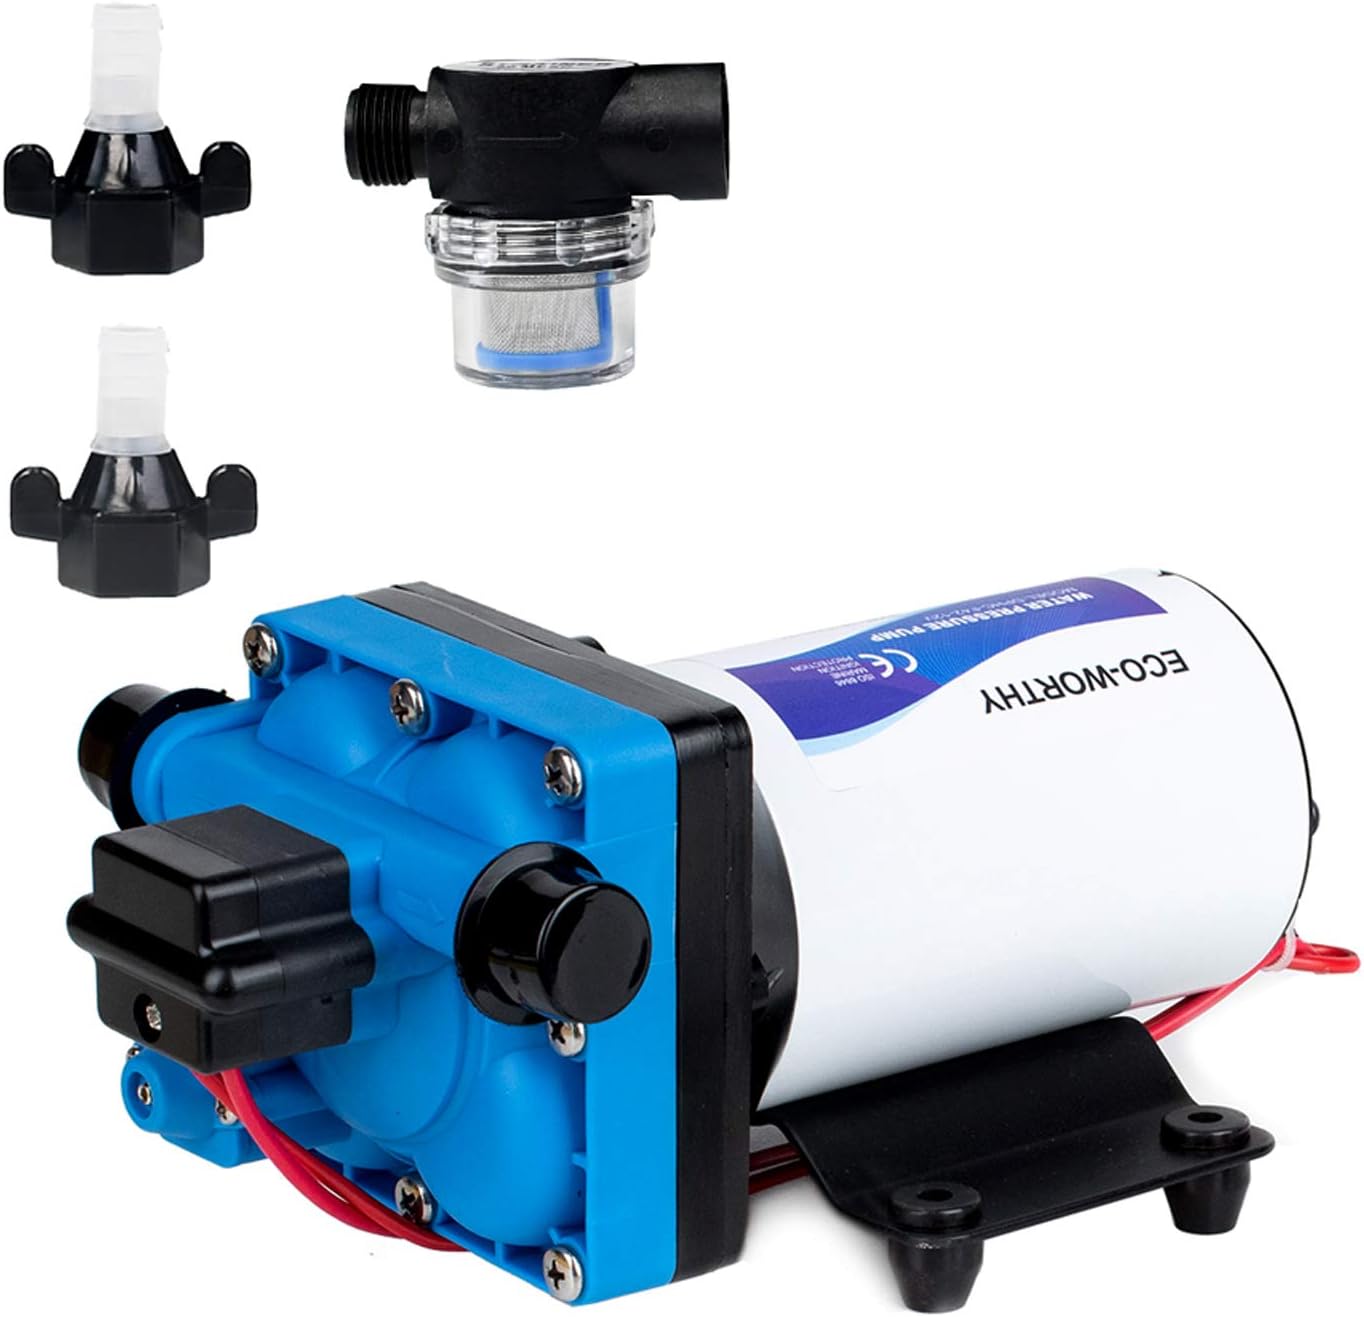
Some RVs will have a pump built in that will allow you to pump the water from jugs into your tank. If you don’t have this in your RV then you will need to buy an external 12v water pump. Attach the pump to a piece of plywood for ease of use.
To fill the tank you will attach the home from your RV to the outlet of the pump and a short piece of hose to the inlet. Place the short hose into the bucket or jug of water and turn the pump on to fill your water tank.
Without a pump
If you don’t have an external pump there are a couple of ways you can fill your tank from jugs of water. While collapsible jugs can be easier to store when empty you may find hard-sided jugs such as Gerry cans easier to manage, especially for gravity filling.
Use the antifreeze line
If you have an external shower outlet and a winterizing antifreeze line you can hack the system to pull the water from jugs into the water tank using the pump in your RV.
Run the antifreeze hose into the bucket and connect the outlet of your external shower to the water tank. Turn the external shower on.
When you turn the pump on it will pull the water from the jug and run it through the external shower into the tank.
Gravity
If you can get the water jug above the water intake you can use gravity to fill the tank. You will need a water jug with a spout such as a Gerry can. With a Camco Water Bandit, attach the hose to the spout.
Lift the jug above the height of the intake valve and gravity will do the work. Since water is so heavy it helps if you can get the water jugs on a raised platform such as the back of a pickup truck so you don’t have to hold it over your head.
Always bring extra bottled drinking water
You can always go a few days without showering but you need drinking water to survive. When you are on any trip that will get you away from a reliable water source it would be wise to pack extra drinking water.
Whether it is cases of bottled water or a couple of jugs, having an emergency backup of drinking water is important in case of a malfunction of your water system.
You might even want to consider packing a portable water filter of the type backpackers use to process safe drinking water from lakes and streams.
Conclusion
Now you know how to fill an RV water tank. With a little knowledge and work, you can keep your freshwater system in your RV safe and functional.
When you understand how the system works it is much easier to manage, especially when you are faced with the challenges of running out of water in remote areas.
Practice at home before you go and you will be able to deal with any water situation when you are out in the field.