

How To Use Backpack Loops Like A Real Pro [An Easy Guide]
When packing your backpack, we suggest putting as much of your gear inside as you can for a clean aesthetic and protecting your valuable camping equipment.
But sometimes you need to attach things to the outside of your pack.
When it comes to the external mounting of items to your bag, it can be due to lack of space, wet gear, or you have things you want quick access to.
To attach things to the outside of your pack, you have to know how to use backpack loops to securely mount items and keep them from getting in the way.
We cover all the details and best practices of mounting things outside your pack using the backpack loops.
These are the exact techniques I use on my numerous hiking and backpacking trips that bring me great results.
So, if you want to learn some proven tips that work, read on.
Let’s dive right in.
What are backpack loops?
Backpack loops, also called gear loops, are external load-bearing points you can use to attach gear to the outside of your backpack.
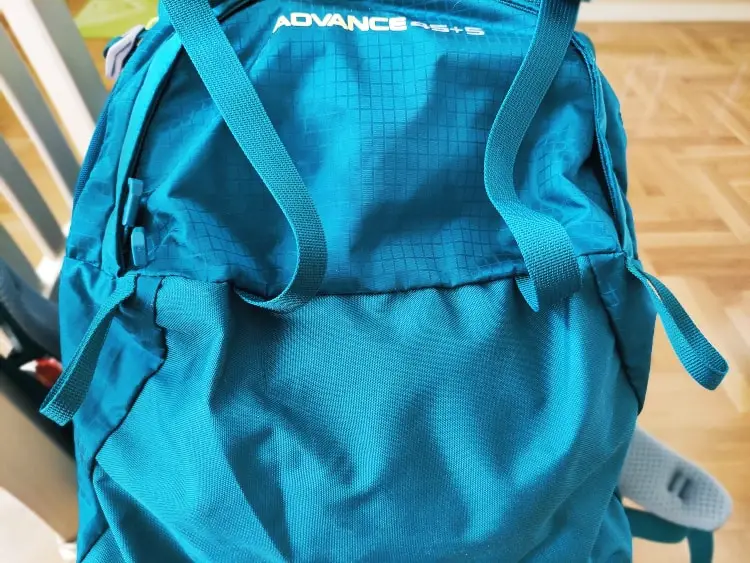
The backpack loops at the bottom of my Nevo Rhino backpack.
We often call them tie points or lashing points. You can find those on the top, back, bottom, shoulder straps, and hip belt. Often, there are loops on the side compression straps as well.
Many backpacks made for hiking also have loops for attaching ice axes and trekking poles. And in winter, we often use ice axes.
Backpack companies are trying to design packs that will work in all four seasons in various climates, so they try to give you as many options as possible.
What Are Backpack Loops For?
Backpack loops allow you to increase the versatility of your pack by attaching extra gear to the outside when needed.
There are a bunch of uses for your backpack loops. How you use your backpack loops will vary based on this use.
Here are the most common roles for backpack loops.
Attaching items you want to access readily
Any items you don't want to have to dig in your pack for and are relatively small can mount on your backpack loops. For example, you can clip GPS, phone case, ditty bag, or knife to the gear loops.
If you use a satellite tracker such as a Garmin Inreach or Spot device, they are best attached to the top lid of your pack for the best reception.
If you wear clothing with few pockets, a small bag clipped to the shoulder strap can act as your pockets. So you have a pocket attached there for convenience.
I keep my phone, glass cleaning cloth, a lighter, and gum in a Sealine clear-sided passport protector.
It has a D-ring on the back, so it is simple to clip to the shoulder strap of your backpack with a mini-carabiner.
On one of my backpack loops, I attach my Unigear dry rucksack. By the way, we have a nice list on the best dry bags of 2021 here.
Women often complain that their outdoor clothing doesn't have enough pockets. A 1-2-liter waterproof bag can become your off-road purse keeping those items you would put in your pockets within easy reach.
Expanding the capacity of your pack
Backpack loops are an essential part of all backpack parts when it comes to "enlarging" your pack.
You can expand your backpack's volume by mounting an external pouch using the backpack loops.
It's excellent for attaching sleeping bags, or sleeping pads, for example.
Backpack companies make integrated small day packs designed to attach to some of their bags to give you more useable space.
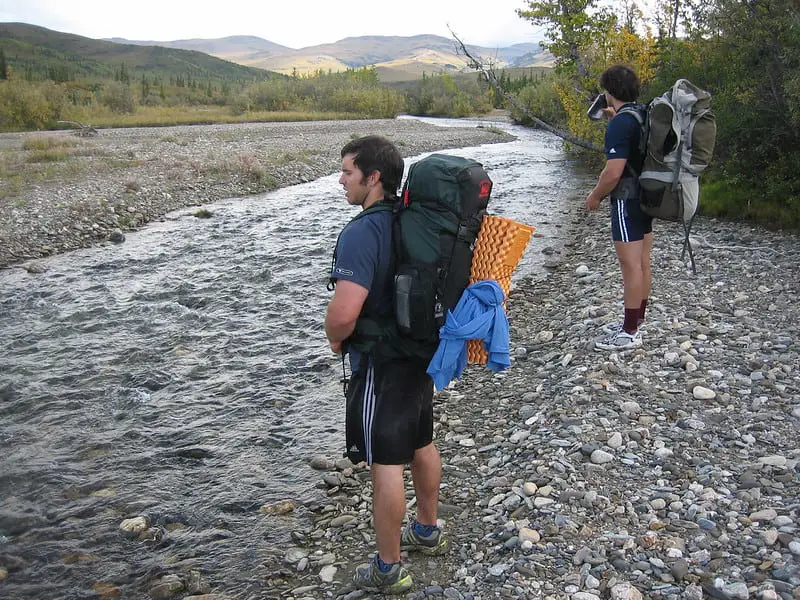
Photo by Paxson Woelber on Foter.com
The small pack can also double its use for summit pushes or day hikes from a base camp. You don't need your entire backpack's volume for that, right?
To free up internal space, you can lash your tent or sleeping pads to the outside. It works for sleeping bags too. I put my sleeping bag there with ease.
The rear bottom straps that are built into the pack are best used for this function. Some even use the compression straps for that, but it's not as easy.
As you probably know, the compression straps help in tightening up the load and pushing it closer to your core muscles.
Since these straps usually have a quick connect buckle, putting items on and off is fast. If you use a foam sleeping pad, it has to be strapped outside due to its bulk. In such cases, the backpack loops come in handy.
Check the tightness of the strap regularly, as they can loosen as you hike. If something big like your tent bag fells off, you probably would notice, but it isn't worth taking the chance.
Make sure anything other than a foam pad you lash to the outside has a protective bag, as it will be subjected to more wear and tear on the outside.
Drying your clothing
If you are hiking during the day, your backpack loops can make a great place to hang your clothes to dry.
They are perfect for hanging wet or dirty clothing. In fact, it's the best way to carry wet or dirty clothing, especially if your pack is small.
In such cases, those attachment points are very useful.
Since you will often fold your dirty clothing over under straps, it's good to flip it around partway through the day, so all of the material is exposed to the air.
Even if your dirty clothing is dry, if you have been wearing it for several days, it can stink, so strapping it to the outside of your pack, using the backpack loops, will let you air it out.
Carrying unusual items
In winter, you will need a compact shovel for camping. Having loops on backpack straps will help in that.
Backpacks don't have a specific attachment point for them, so you will need to use webbing straps or a cord (elastic or non elastic cord) to lash them to a few loops.
The same goes if carrying an axe or other tools. You have to get creative. Just try to balance the loads, so you don't have too much weight on one side.
It's not said that you can attach only your sleeping bag there.
Many backpack brands include webbing loops. The webbing loops are designed to be used with an elasticated cord.
You can tie some bulky items (heavy objects) on the elasticated cord and interlace them across your pack. That creates a custom rigging. And the custom rigging will hold another layer of bulky items.
Another great use of backpack loops is that you can use them to attach your pack to a luggage rack when travelling.
For example, you can attach it to the luggage rack of a pickup for maximum security when travelling.
How to use backpack loops the right way?
To use backpack loops, you can either clip an item with a carabiner to a backpack loop or use a strap or cord to lash it down.
Another important tool of the backpack parts are the bungee cords.
Bungee cords are also suitable for attaching light items like jackets. You can make your stretchy cords by getting a shock cord from a fabric or camping store.
“Nite Ize” mini s-shaped carabiners are perfect for attaching to the ends of the line. I use a bowline or scaffold knot to connect the shock cord to the s-biner.
Depending on the items you need to attach, you might only use one point or multiples to mount securely.
If something will throw off your balance or get damaged when swinging around, then it is best to anchor it by at least two points to keep it static.
If you will mount something bulkier, it is best to use straps to cinch it down. Just like the pair of straps attached to the bottom of most packs, using two will increase how secure the item is held and keep it from swinging around as you like.
You can also clip additional equipment using a webbing strap. Most pack loops enable you to use not only a carabiner but a webbing strap.
Types of backpack loops
Let’s see what the different backpack loops are.
Carry Loop
The carry loop is located at the top of the shoulder straps. It isn't designed for attaching gear. Instead, it is a handle for picking up or hanging your bag.
So, you can't attach your trekking poles there, for example.
Shoulder strap loops
Backpack shoulder straps will have someplace you can attach gear. My main pack is an Osprey with a loop on each shoulder strap to connect my GPS on one and my knife on the other.
You can also get add-on pouches designed to attach to the shoulder straps. These include small camera cases and phone holders.
They are not designed to carry heavy gear and heavy objects, though. I've seen some folks carry their water bottles there, thus leaving the side pockets free.
In that way, you can store something else in those side pockets.
Hip Belt Loops
Hip belts often have zip-up pockets, but it is common to see webbing loops you can use as attachment points.
I use Outdoor Research Insulated Bottle holders attached to the hip belt to keep my water from freezing and easily accessible in winter.
Use the hip belt loops to attach items you want an easy access to since they are easy to reach on the go.
Molle webbing
Molle is used on military and tactical bags to attach pouches securely to the outside of a pack. It allows you to customize your backpack. Standard pouches are first aid kits and water bottle pouches.
If you have this type of pack, then it is simple to use, but I've used Molle pouches on non-Molle backpacks to a good result.
Since these are made using military standards, you can use them to attach heavy objects. Military guys carry a lot of heavy objects attached to their packs without keeping them off balance.
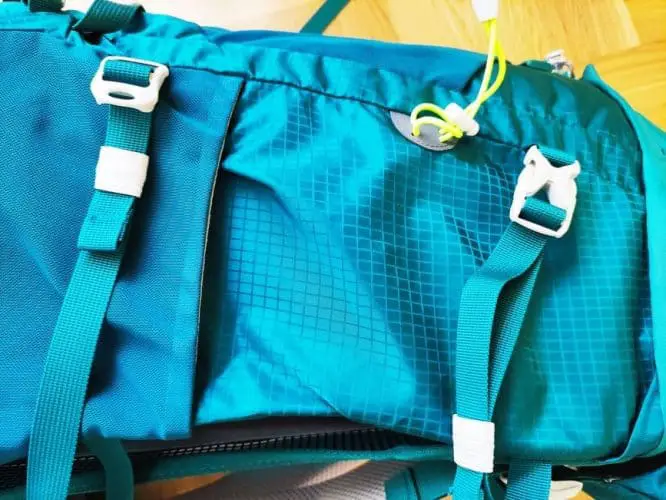
Side compression straps
While not specifically a loop to attach things to, the compression straps (also called backpack straps) at the side of your pack make a great spot to attach any long and thin gear.
Normally you use them to compress the load so you get the load closer to your body when you walk. And when you have the load closer, you feel more comfortable, especially on crumbling terrain.
It's a nice working compression system. Just like the webbing straps.
Some packs such as the Granite Gear Crown have reversible compression straps. You can use those to attach gear to the front of your rucksack.
For that, the ends of the straps have clips - there's a male clip and a female clip on the opposite sides.
I will strap in my tent poles or my fly-fishing rod. The water bottle pocket on the bottom keeps anything from slipping out.
And they are useful for hanging heavy objects or items that have sharp edges. Tight them up right, so they don't keep you off balance.
The backpack straps on the compression system are super useful. In fact, all backpack straps are if you know hot to use them.
I really like the compression straps since they distribute the load more evenly, pushing it closer to your core muscles. In that way, you carry equivalent weight on your lower body.
Top lid loops
The top lid is a top pocket that uses four webbing straps. That top pocket isn't sewn-in.
Not all packs have lash points on the top pocket, but you can use these points to mount light items you want to keep off of the ground.
When securing extra gear, we would be remiss if we didn't mention the floating lids. Adjustable quick-connect webbing straps hold the floating lids in place.
The floating lid helps align the load to your spine and core muscles, thus distributing it more evenly across your body. And you know that having your load closely aligned prevents injury.
So you carry an equivalent weight on your hips, for example. It's not just for storing gear.
When used in this manner, the floating lids act to keep gear in place. I often put my puffy jacket or rain gear under the cover for quick access.
You can even attach water bottles there. Those are small backpack loops. Logically, you use small backpack loops for items that are not too hefty.
Still, you can attach there compressed tent bodies. A lot of overnight backpacks have such loops. And a lot of larger packs too.
These top lid loops provide that much needed vertical compression keeping the load tightened up.
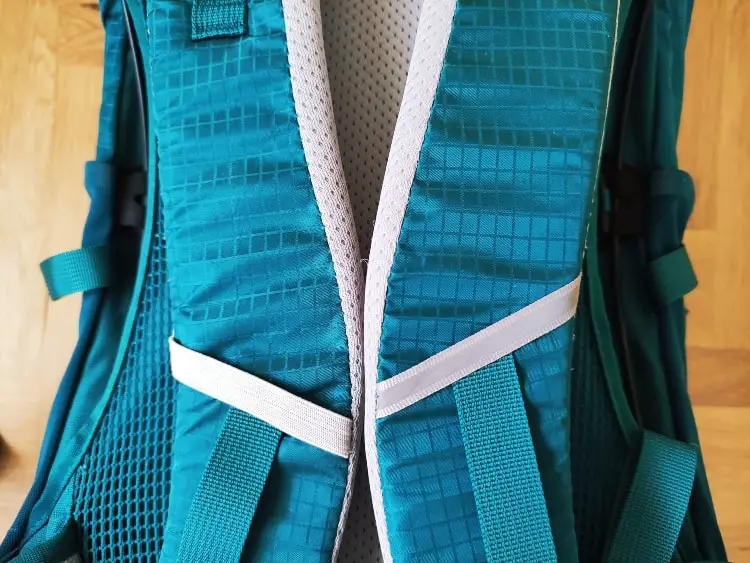
Back loops
The back of most packs will have at least four backpack loops that you can attach gear. They can be oriented vertically or horizontally, so how you use them will vary based on this.

The vertical loops close to the back panel will usually have one on each side, allowing you to anchor gear down between them. Webbing straps, cords, or bungees can all be used to connect the two sides.
It works well for bulky equipment such as cylindrical tent bags. So, use them for items you don't want easy access to.
Bottom loops
Most backpacking packs have adjustable straps on the bottom of the bag. They allow you to attach more oversized items such as sleeping pads, sleeping bags or a tent.
Some packs have lash points but don't have built-in straps. Measure the width of the lash point, so the webbing straps you get fit. Try to get the widest straps that fit, as they have less tendency to roll and hold better.
These work quite well for attaching cylindrical tent bags, tent bodies, and other kinds of heavy gear and heavy objects.
Most overnight backpacks and large backpacks in general, have bottom loops.
Ice Axe Loops
If you've ever wondered what the thin backpack loops on the bottom rear of a backpack are for, then wonder no more.
They are for attaching ice axes and other objects with sharp edges. If your trek has you crossing snowpack or glaciers in the mountains, an ice axe is indispensable, but awkward to carry when you aren't using it. The loops allow you to mount ice axes to your pack safely.
They also can work well to mount your backpacking shovel or trekking poles if you need to go hands-free.
I normally secure my trekking poles there or two ice axes. I don't like them to be freely moving anywhere else on my pack.
Sure enough, it works for any bulky equipment. So it will work if you find yourself attaching heavy items.
Most climbing packs have such loops.
What are daisy chains?
Daisy chains are just a series of loops that are connected, hence the chain. They are not individual loops but are as helpful as individual loops.
They give you the option of different lash points or to run multiple straps to hold an item more securely.
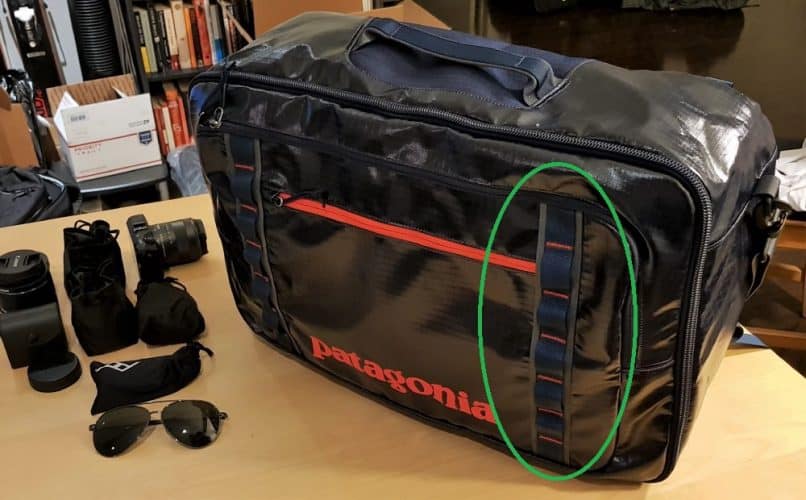
Image via Pangolinswithpacks.com
There are often two daisy chains parallel to each other, allowing you to strap items down between them. They use nylon webbing for rigidity.
To increase the functionality of the chains, you can weave a web of shock cords between them.
Then you stuff gear under the shock cord, leaving it accessible to retrieve but securely held. The nylon webbing there is usually quite sturdy.
A lot of climbing packs have such chains.
Disadvantages of using backpack loops
Sure enough, everything has its pros and cons. So far I presented you with the pros of using backpack loops.
But what are the main cons? Let’s see:
- Can be noisy
- Items on the outside can get damaged
- Can throw weight balance of pack off
- It looks cluttered and messy
- Easier to lose things on the outside of your pack
Conclusion
Now you know how to use backpack loops to best effect on your next camping trip. While your gear is more protected within your pack, sometimes you will want to make use of the extra capacity the backpack loops afford you.
Just do your best not to look like an old-time miner. With so much stuff on your pack, you sound like you spilled the cutlery drawer as you walk down the trail.
Anyways, happy hiking!
Asen Stoyanchev
Founder of this website, Asen is a passionate hiker and writer who is also a gear nerd. He’s been featured on many established hiking websites where he gives hiking advice & tips. When he is not trekking with his family or friends, he is writing articles and product reviews. Asen spends most of his time in Bulgaria but he constantly travels the world in seek of more unforgettable experiences. Read more about Asen here.