
")
The Parts Of A Tent Explained (Dead-Easy And Stupid-Simple)
When you are camping, your tent is your house. It gives you protection from the elements and privacy from those around you.
But what do you know about how a tent is put together? Also, do you really know the different parts of a tent and their purpose? How about using them?
Not all tents are made to the same standards. It might be designed to meet a price point or handle the harshest conditions.
What is it made of, how does it go together and what performance is reasonable to expect?
Understanding this can make your camping experience better because you will better use your tent to the fullest of it capabilities.
And if it doesn’t perform a certain way, you won’t be surprised because you actually understand its intended use.
This is a full guide that we may also call “Camping Tent Anatomy 101”. First, let’s take a look at the different tents. Later, that will give you a better understanding of each tent component such as the inner tent and among many others.
Let’s dive in.
The Types Of Tents
Did you know that there are 7 of them? Let’s take a closer look before explaining the parts of a tent.
Single wall vs double wall tent
Traditionally tents have been a two-part construction with a main body with waterproof floor (part of the inner tent) that the poles attach to and a waterproof rain fly over the top.
This effectively created a double walled tent that was waterproof, but condensation would be on the fly and run down the inside and keep the inner tent tent dry.
Double walled tents also tend to be warmer as there is a layer of trapped dead air between the inside and outside of the tent.
Additionally, if the weather is dry then you can use the tent without the rain fly giving you a nice view of the stars through the bug netting when in the inner tent.
With experience, new materials and drive to make lighter weight, companies have been making single walled tents that don't have a rain fly over the top.
By using waterproof material throughout with strategically placed vents, they can do away with the separate rain fly.
While often lighter, these tents don't offer the same level of weather protection of a good double walled tent. Their inner tent area is not as comfy.
Free standing tent
This is a tent that with a combination of the poles and fabric will stand up on its own without being pegged to the ground.

This can be important if you camp in rocky areas where pegs won't penetrate the surface. It can also be nice for cleaning, as you can just pick up the tent and shake out any dirt and debris. Easy!
Non-Freestanding Tent
If your tent needs to be pegged to the ground and have tensioned guy lines to hold its shape, then it would be considered non-free standing.
These tents can be much lighter as they don't have the same pole structure as a free-standing tent. Keep in mind that many tents that fit this category will use your trekking poles to hold the tent up, so make sure you always bring them.
Three-Season Tent
You can use three season tents during spring, summer and fall. The construction can keep water and bugs out, but isn't tough enough for the high winds and snow load you can get in winter.
Plus, as the upper portion of the tent body is mostly bug netting, the inner tent part isn't as warm as the fabric used in winter tent would be. Three-season tents are generally appropriate for hot weather as they are better ventilated.
Winter or mountaineering tent
Since winter or mountain conditions can be much more extreme, these tents are tougher. They have stronger poles and more of them to increase strength.

The tent body is breathable fabric rather than bug netting to increase warmth. All the fabrics are heavier to stand up to heavy snow and wind. The inner tent is warmer as well.
All these features that make winter tents well suited for these conditions also make the weight much heavier. Just as with backpack weight.
Hot tent
Made for use in winter, the hot tent is a heavy canvas tent without a built-in floor. Usually it is used with a portable wood-burning stove, hence the hot tent designation. You can imagine that the inner tent design is designed to be warm.
To use you would shovel away the snow where you want to set up. The tent is pegged out and then snow is back filled to keep the wind from coming in the bottom. This can be a more comfortable way to camp in cold conditions, as you have the added heat of the stove all night. The downside is the weight, cost and need to process enough wood to feed the stove.
To transport the tent and stove you would pull it on a sled rather than carry it in a backpack. Such tents are efficient when you're tent camping in the wilderness and have to learn how to heat a tent without electricity.
Tarp Shelter
If you are looking for the lightest option, then a tarp shelter can be also the best option. They use trekking poles and pegs to hold up the tent body.
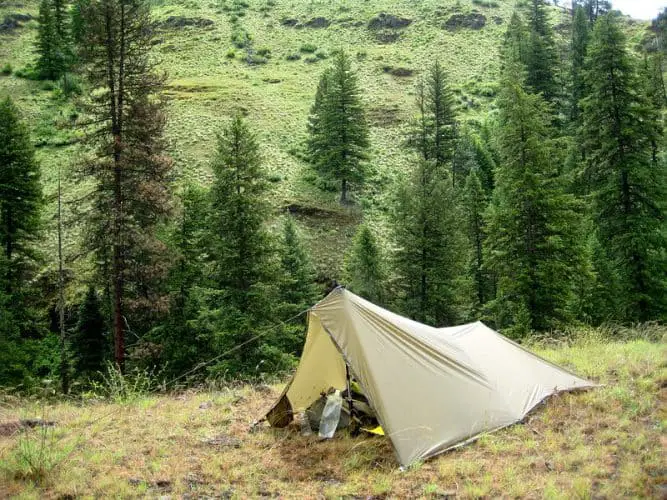
Photo by Pig Monkey on Foter.com / CC BY-NC-SA
There are options that come with bug netting. They don't give the same weather protection on the inner tent as a full coverage tent, but are a good option for ultralight backpackers.
In summer, many folks use a tarp to blackout their tents.
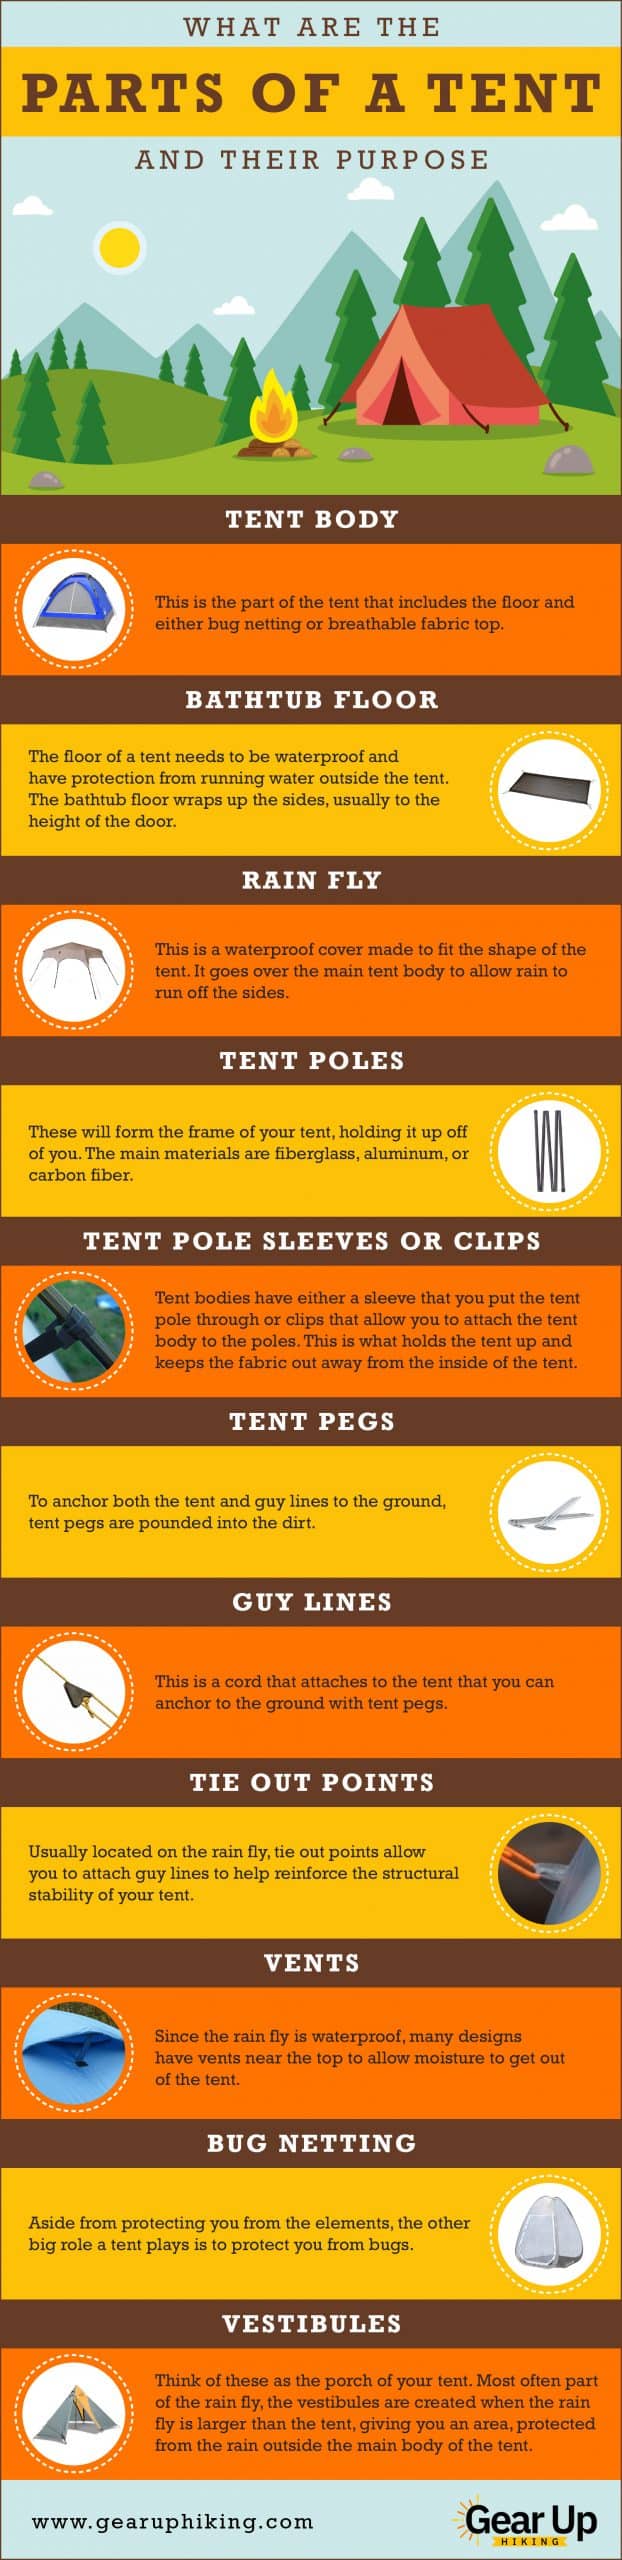
What Are The Parts Of A Tent And Their Purpose?
Here's a nice infographic. Besides everything else, it describes in a visual way the inner tent and the other tent parts.
Share this Image On Your Site
Now, let's examine the parts one by one.
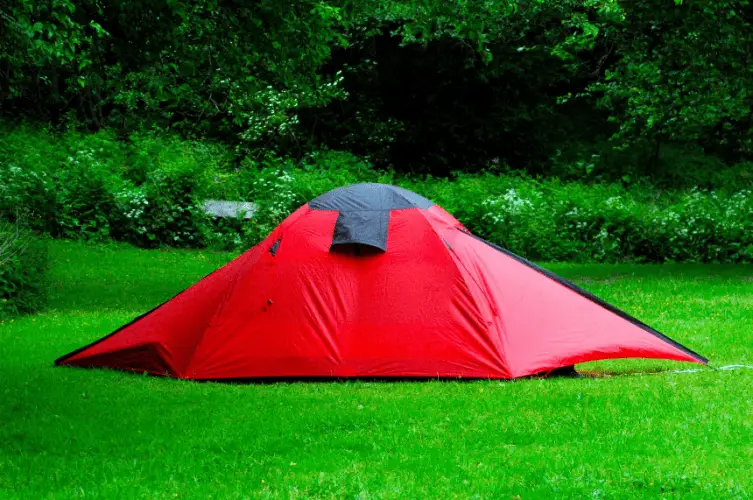
Tent Body
Also known as outer tent, this is the part of the tent that includes the floor and either bug netting or breathable fabric top. If you have a single wall tent, then it would be the entire fabric of the tent.
Bathtub floor
The floor of a tent needs to be waterproof and have protection from running water outside the inner tent. The bathtub floor wraps up the sides, usually to the height of the door.
This tends to be heavier material than the rest of the tent to resist abrasion and puncture from you moving around in the tent.
Rain fly
This is a waterproof cover made to fit the shape of the tent. It has a significant role in the parts of a tent. It goes over the outer tent body to allow rain to run off the sides.
Most also have tie points to allow you to add guy lines (also known as guy ropes) which you can peg to the ground to resist wind, thus also keeping the inner tent protected.
Those who like stargazing pay special attention to the rain fly. The best stargazing tents have a rain fly that you can roll back when in the tent at night so you can enjoy the night sky.
Tent poles
These will form the frame of your tent, holding it up off of you. The main materials are fiberglass, aluminum, or carbon fiber.
To fit in your pack or compression sack, they disconnect, fold up and have shock cord holding them together. When assembled the ends are anchored to the tent body, forming an arc that will make the shape of the outer tent.
Most tents have multiple poles that work together to give the tent a reasonably stable structure. You can also feel that when in the inner tent.
Tent pole sleeves or clips
Tent bodies have either a sleeve that you put the tent pole through or clips that allow you to attach the outer tent body to the poles. This is what holds the tent up and keeps the fabric out away from the inner tent.
Clips are easier and are what you find on most modern quality 3-season tents. Many winter or mountaineering tents still use sleeves for the poles, as it can be stronger to deal with wind and snow load.
Tent pegs
To anchor both the outer tent and guy lines (guy ropes) to the ground, these are pounded into the dirt.

Photo by Theen … on Foter.com / CC BY-NC-SA
Made from aluminum, plastic or titanium, pegs come in different shapes to optimize holding power in various types of soil. If you camp in windy weather, you need the best tent stakes for high winds.
Don't miss reading our easy guide on using tent pegs the right way.
Guy Lines
This is a cord that attaches to the outer tent that you can anchor to the ground with pegs. Like a radio tower, the guy lines (guy ropes) add stability to the inner tent and help it withstand windy conditions.
Tie out points
Usually located on the rain fly, tie out points allow you to attach guy lines to help reinforce the structural stability of your outer tent. These tent parts are crucial to the overall structure.
Vents
Since the rain fly is waterproof, many designs have vents near the top to allow moisture to get out of the sleeping area of a tent.
This will help with reducing the amount of condensation that builds up on the inside of the rain fly and therefore on the inner tent. Plus, it helps for protection in windy conditions.
Bug netting
Aside from protecting you from the elements, the other big role a tent plays is to protect you from bugs.
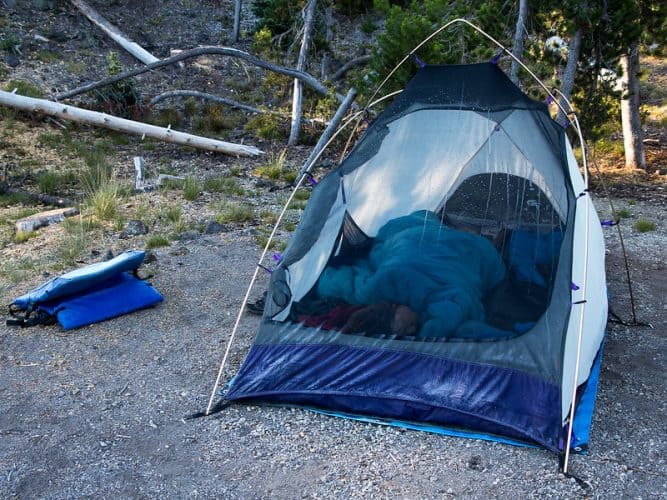
Photo by alex1derr on Foter.com / CC BY-NC-SA
To accomplish this, most 3-season tents have the top half of the main outer tent body constructed from bug netting. This will improve ventilation and keep you from getting eaten alive when in the inner tent.
Vestibules
Think of these as the porch of your tent. Most often part of the rain fly, the vestibules are created when the rain fly is larger than the tent, giving you an area, protected from the rain outside the outer tent.
Tent fabrics explained
Let’s see the materials used on the various types of tents, be it on the inner tent or the outer tent.
Nylon
This is the most common material to make tents from because it is light, strong, and easily waterproofed. Also, if you have a nylon tent, then chances are that it will dry much faster.

Nylon fabric close-up.
Nylon fibers are woven into a fabric. Most of the fabrics are made in a ripstop pattern that will keep a small hole from tearing all the way through.
Nylon is treated with silicone or polyurethane to make it waterproof. Many backpacking backpacks use nylon as their main component.
Canvas
Woven from cotton or other fiber, canvas is thick. Not waterproof on its own but can be quite weather resistant when treated with a waterproofing like wax or linseed oil.
Canvas is great for hot tents or other heavy-duty applications as it is very durable but too heavy for backpacking applications.
Dyneema Composite Fabric
The newest of the fabric options, Dyneema composite fabric (formerly known as Cuben fiber), is laminated rather than woven. Dyneema, which is for its weight 15 times stronger than steel, are the core of the product.
The Dyneema fibers are sandwiched between two layers of polyester, making a fabric that is puncture and tear resistant while at the same time being much lighter than nylon. This allows companies to make two-person tents that weigh well under 2 lbs.
Tent Accessories And Additions
Here I will show you some pretty handy tent accessories. They are often used by us backpackers and campers as they provide extra usability in some situations.
Gear Lofts
Many tent manufacturers have made a gear loft for their tents that give you extra storage space suspended from the ceiling.

Photo by tiswango on Foter.com / CC BY-SA
Think of it as a mesh hammock that will hold things like your headlamp, phone and any other small items. A few tents come with them, but mostly, you have to buy them separately.
Candle lanterns
To minimize condensation build up in the inner tent, the use of a candle lantern suspended from the ceiling can do wonders.
It heats the air near the top of the tent, creating a convective current that will help pull the moisture in the air out of the vents. It also adds a bit of warmth and lighting.
Tent Pegs
Most tents come with a set of tent pegs, but they often aren't the best quality. There are different pegs for various ground conditions.
A simple wire peg won't hold well in sand while a wider peg won't go into dense gravely soil very well. Plus, you bend and break them fairly often, so always carry a few extra.
Ground Sheets
Tents can get expensive, so it is wise to protect your investment by putting a ground sheet under your outer tent.
This helps keep the floor of the tent from being punctured or abraded. Many folks even go further and use washable tent carpets.
Most tent manufacturers make ground sheets to fit their specific tents, but you can also use generic ones. Just make sure the dimensions are a couple inches smaller than your actual tent floor. You don't want the ground sheet to extend past the floor of the inner tent, as this will allow water to collect under your tent.
Add-on vestibules
If you have a lot of gear or plan to stay in one spot for a while, then an add-on vestibule can give you the extra protected storage space you need.
Companies like MSR make a gear shed to add on to a number of their tents. This will give you a lot more space that is protected from rain.
High visibility guy lines and zipper pulls
When fumbling around in the dark, it is easy to trip over your tent guy lines. To combat this, companies make either reflective or glow in the dark guy lines.
These can make your tent easier to find when you go pee in the middle of the night and reduce the risk of accidents.
Finding the zipper pulls to get into your tent can pose the same problem in the dark. Glow in the dark versions make it easier to get in your inner tent without having to put on your head lamp and wake everyone else in the tent.
Pretty cool, right?
Repair kits
When away from civilization you have to be self-reliant, which means doing your own repairs.

Carrying a tent repair kit can fix anything from a hole in the floor or fly to tears in the bug netting or broken tent pole.
Water proofing treatments
The waterproofing on your tent will eventually wear off, especially on the seams. Retreating your tent will renew the waterproofing and keep it functional rather than having to get a new one.
There are both sprays and brush-on treatments for the rain fly. The seam sealer usually comes in a tube with a built-in applicator brush to make applying a simple process.
What holds up a tent?
This will depend on the specific tent, but generally it is a combination of the tent poles and tension from the fabric being pegged to the ground. The tent body and rain fly are then attached to the poles, which hold everything up.
Some tents are held up with trekking poles and guy lines attached to the pegs. Before going out on a camping trip, make sure you are familiar with the tent assembly instructions.
If you can, practice setting it up beforehand in the backyard or local park. You don't want to be fumbling around in the dark trying to set up your tent for the first time.
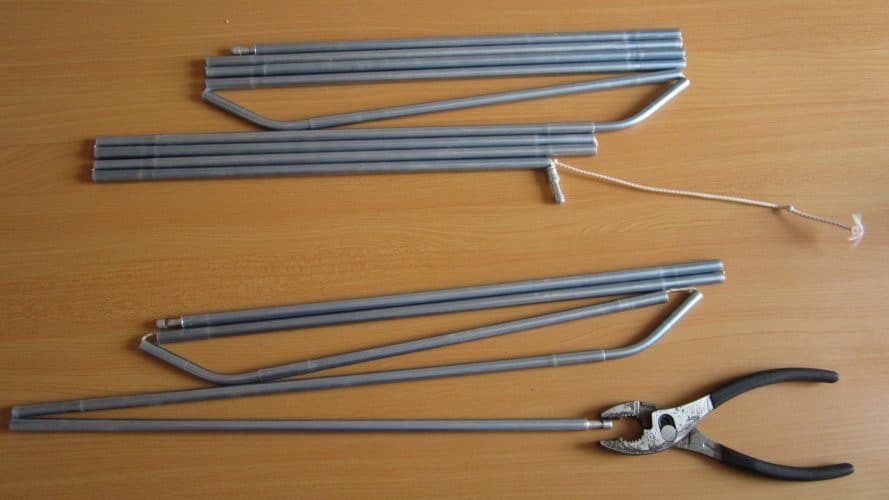
How to replace a tent pole
Tent poles are pretty durable, but they can still break or bend. It might be high winds or just accidentally stepping on one. But life happens, so what do you do if you need to replace a tent pole?
This will depend in large part on your tent.
Some modern tents have poles that are part of a connected system, so individual poles are hard to replace.
If this is the case, you will need to order a complete replacement from the manufacturer. The plus to this is that many higher quality tents come with a lifetime warranty, so they will often replace it for free.
If it is just a single pole that needs to be replaced, you can use replacement kits. These are usually fiberglass, which is heavier than aluminum but is better than having to throw your tent away.
You will need to measure how long your existing pole is and cut the replacements to fit this length. Since tent poles are made up of multiple pieces that slot together, it is best to cut them all to the same length.
Use a super fine hacksaw blade and cut halfway through. Then rotate the pole 90-degrees and finish the cut. Be extra careful, as you don't want the fiber glass to fray and split.
To reduce the chances of the fibers fraying, wrap the part of the pole you want to keep with electrical tape just below where you are going to cut.
Once all the pieces are cut, then you have to run the shock cord through each pole and connect to the end cap. I like to make a loop using a bowline knot as it fits through the middle of the poles better than a larger knot will.
Where to set up your tent
If you are going to a campground that has marked sites, then your options for where to set up your tent are going to be limited. Make sure it is at least 30 feet from the fire pit as you don't want embers burning holes in your tent.

Find the flattest spot and remove any debris such as sticks and rocks from the ground so you don't puncture the bottom of your tent.
If there is a slope to the ground position of the tent, your head will be on the uphill side. You will likely wake up with a headache from the blood pressure increase of your head lower than your feet.
If you set up so you are sideways to the slope, you will slide into the people you are sharing the tent with.
But not all camping takes place in drive in camp grounds or prepared sites. When looking for camp site when backpacking in the wild, there are a number of things to keep in mind.
Avoid either low or high points. Low points of land collect water if it rains, and high points get hit with more wind. In colder conditions the cold air pools in low spots so if you can find a flat spot even 10-20 feet higher it will usually be noticeably warmer.
Look above you to make sure there are no dead trees or branches that could fall on you. The wind tends to pick up in the evening and can make these trees fall.
Choose a spot near a water source so it is easy to collect water for drinking and cooking.
How to set up a tent
Here are a few general tips that will help you out when setting up your tent.
Peg out the corners before putting in the poles. This will keep the fabric tight and hold it in place as you bend the pole into position.
If the tent has sleeves for the poles, then it will erect itself by putting both ends in the appropriate spots. If it has clips, then after the poles are attached at the ends, clip the tent body in place working from the ground up.
Once the tent body is erected install the rain fly over the tent. With the supplied attachments, connect the rain fly to the base of the tent body. Peg out the sides of the rain fly so you have air flow from the bottom. If your tent has a vestibule, then peg it out to tension the fabric.
In windy conditions, peg out the additional tie out points on the rain fly guy lines to give more structural strength.
Position the tent with the door facing away from the wind. This can help keep rain from blowing in as you enter and exit.
If you have to set up your tent on rocky ground that doesn't allow you to pound in tent pegs, then use rocks or logs to anchor your tent. Using cord, tie the corners of your tent and the tie out points to these anchors to keep your tent in place. It is a good idea to always bring some extra cord with you just for this application.
How to attach a tent on a backpack
This is one of those topics that has no right answer but a lot of opinions. Some people will just use straps to attach their whole tent bag to the outside of their pack.
Others will stuff the tent bag inside their pack. You can even stuff it in the sleeping bag pocket in case you don't need a sleeping bag.
I go about it a different way, breaking the components up so they pack easier. The tent body goes inside the waterproof pack liner I put in my pack.
The rain fly goes in the outside mesh pocket on my pack as it may be wet from rain or condensation. I slide the poles in their bag under the compression straps on the side of the pack.
I have another small stuff sack with the pegs, repair kit, and extra cordage that I put on the outside mesh pocket. By doing it this way, I can keep the inside of my pack dry and take up less space inside my pack.
How to fold up a tent
One of the mysteries of the universe is how you fit your tent back in the bag it came in. Even if you carry your tent in your backpack the way that I recommend, then when you get home you will want to pack up your tent for storage.
Having worked in the outdoor industry for years, both at the store level and guiding trips, packing up a tent is a skill I can say I'm pretty good at.
- When you take your tent down, fold up all the poles and pack them in the supplied bag. Then separate the tent body and rain fly.
- Fold up the tent body lengthwise, so you have it the width of the collapsed poles. Then place the rain fly on top of the tent body with the top of the fly towards you.
- It will be like a parachute that you grabbed by the top. Pull in the sides of the fly so it is within the width of the folded tent body.
- Then place the bag with the poles across the tent body/fly combo. Using the poles as a spindle, roll the two together, trying to get as much air out as possible. If you use a ground sheet, you can also roll it up with the rest of the tent.
- Once completely rolled, you will have a bundle that should fit in the tent bag. Don't worry if the first few times you attempt this, it seems messy. With practice, you will be a pro at packing up your tent.
- Once you have fit it in, then you can add the sack of pegs to the bag and everything will be packed up.
If you have a pop-up tent, then packing it up is much simpler. Pop the sides and top in, flip it upside down and fold the frame. From here it helps to have someone hold the bag as you put it in.
Conclusion
The basic concept of a tent is simple, but as you see its construction can be quite complex. Most tents have had a lot of thought and testing go into their design.
Understanding the structure of your tent and how its parts work together will better allow you to have a fulfilling experience when you are out camping.
Knowledge of your gear at the least will help you have a dry night’s sleep in the sleeping area of your tent. At most can save your life in challenging conditions.

Winston Endall
Having worked in the outdoor, fitness, and cycling industry his whole life, Winston brings a wealth of real world knowledge on the topics. Rock climbing, backpacking, cycling and wilderness survival are his life. As both an athlete, coach and outdoor educator, his practical experience translates into his writing to help people better pursue their outdoor passions.. Read more about Winston here.